Saturday, May 9, 2015

How to Turn On/Off Damaged Power Button on iPhone/iPad


If you're an iPhone or iPad user, then you might not realise just how much you end up using the power on your phone. The home button is essential to navigate through your device, and the use of the volume buttons and the mute switch on the side is pretty obvious too, but if your power button stops working, you can't turn your phone off - or back on again for that matter.
It's also pretty easy to damage, with external factors such as excess humidity or dust that can make it stop working. You can get by without switching off the iOS device, but it is always good to be able to turn the phone off if needed. These simple steps to switch off the device without touching the power button could come in really handy.
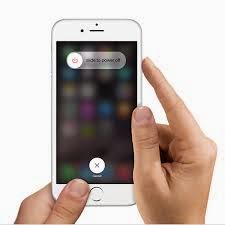
  1. Open Settings.
  2. Go to General > Accessibility.
  3. Scroll down to the section labelled INTERACTION and tap on AssistiveTouch.
  4. On the next screen, toggle AssistiveTouch to the green On position.
  5. A white circle with a grey box will appear on screen. Tap this circle to expand it to a big box on screen.
  6. Tap Device.
  7. Tap and hold Lock Screen until the red-and-white power icon appears on screen with the text slide to power off next to it.
  8. Slide the power icon to the right to switch off the iPhone or iPad.
That takes care of switching the device off, but what do you do if you want to turn it back on? If the power button is damaged, how else can you switch on an iOS device? The answer is - charge the device. Yes, just connect it to a power socket or to a USB port on any computer. The device will turn back on in a few seconds. As soon as the white screen with the Apple logo appears, you can disconnect the charger or USB cable.

Thursday, May 7, 2015

How to Remotely Control Your Computer From a Phone or Tablet


Let assume your friend is having problem with is laptop/pc at school and you are not close by, in spite of giving him instruction on what to do for hour, he can’t seem to fix the issue/problem, it would have been easy if you were there to do it yourself. Here is where Team Viewer come in with Team Viewer you can take over his computer from your phone or tablet, and resolve things yourself over the internet. How do you do that? That's where we step in. Read on:

1.      The first thing that's needed is a little foresight. Download and install TeamViewer on your friend computer now, and on your smartphone or tablet too. TeamViewer is free for personal use on Windows, Mac, Linux, iOS, Android, Windows Phone and BlackBerry, and you can find the download links for all these platforms on the TeamViewer page.

2.      Make sure both the computer and the phone are connected to the Internet.

3.      Open TeamViewer on the computer.

4.      Note down the ID and password that's displayed in TeamViewer - or have someone tell it to you on phone.

5.      Fire up TeamViewer on the smartphone or tablet.

6.      Enter the ID and password you noted down earlier in the smartphone/ tablet TeamViewer app.

7.      Tap Remote Control.

8.      Now you'll see the computer's screen on your phone or tablet. You can control it easily now.

TeamViewer works across the Internet, and not just when the two machines are connected to the same network, so you can now troubleshoot problems on your friends' computer right from office, or if you've installed the program on your home desktop, you can access your files and send those emails you were supposed to have saved to your laptop. You can tap on the screen to simulate a mouse-click, and if you tap on a text entry field, a virtual keyboard pops up so you can type.

There can be a little delay in what you're doing on the mobile and what's happening on the computer, depending partly on the speed of both Internet connections, so it's not the same as being there, but if you just want to troubleshoot something urgently, or if you need to get some important work finished, TeamViewer can be a lifesaver.

There are many more remote connection apps that let you control your computer via your phone or tablet, but we choose TeamViewer because it is easy to use, as you can see from the steps above. TeamViewer is also free for personal use, so that's an added advantage.
Which method do you use to control your computer from your smartphone? Let us know via the comments.

Monday, May 4, 2015

How to Fix Blue Screen Problem on Desktop/Laptop


  How to Fix Blue Screen Problem on Desktop/Laptop

Blue Screen is usually hardware or driver related.. Most Blue Screen show a STOP code that can be used to help figure out the root cause of the Blue Screen.  

Important: Below are general Blue Screen troubleshooting steps.
Note: Some of these steps may require you to start Windows in Safe Mode.
If that's not possible then skip those steps.

Time Required: It might take you several hours to fix a Blue Screen, depending on the STOP Code.
Applies To: Any version of Windows, including Windows 8, Windows 7, Windows Vista, andWindows XP.

Here's How:


1.  The most important Blue Screen troubleshooting step you can take is to ask yourself what you just did.

Did you just install a new program or a piece of hardware, update a driver, install an update, etc.? If so, there's a very good chance that the change you made caused the blue screen.

Undo the change you made and test again for the STOP Error. Depending on what change you made, some solutions might include:

  • Startup using Last Known Good Configuration to undo recent registry and driver changes.
  • Use System Restore to undo recent system changes.
  • Roll Back device driver to version prior to your driver update.
2.  Verify that a minimum amount of free space is available on your Windows partition. Blue Screens and other serious issues, like data corruption, can occur if there's not enough free space on your primary partition used for the Windows operating system.
Note: Microsoft recommends that you maintain at least 100MB of free space but I regularly see problems with free space that low. I usually advise Windows users to keep at least 15% of a drive's capacity free at all times.

 3.  Scan your computer for viruses. Some viruses can cause a Blue Screen, especially ones that infect the master boot record (MBR) or boot sector.
Important: Make sure your virus scanning software is completely up to date and that it's configured to scan the MBR and boot sector.


4.  Apply all available Windows service packs and other updates. Microsoft regularly releasespâtches and service packs for their operating systems that may contain fixes for the cause of your Blue Screen.

5.  Update drivers for your hardware. Most Blue Screens are hardware or driver related so updated drivers could fix the cause of the STOP error.

6.  Check the System and Application logs in Event Viewer (7/Vista | XP) for errors or warnings that might provide more clues on the cause of the Blue Screen.

7.  Return hardware settings to default in Device Manager. Unless you have a specific reason to do so, the system resources that an individual piece of hardware is configured to use in Device Manager should be set to default. Non-default hardware settings have been known to cause a Blue Screen.

8.  Return BIOS settings to their default levels. An overclocked or misconfigured BIOS can cause all sorts of random issues, including Blue Screen.
Note: If you've made several customizations to your BIOS settings and don't wish to load the default ones then at least try returning clock speed, voltage settings, and BIOS memory options to their default settings and see if that fixes the STOP error.


9.  Make sure all internal cables, cards, and other components are installed and seated properly. Hardware that's not firmly in place can cause a Blue Screen so tryreseating the following and then test for the STOP message again:
  • Reseat all internal data and power cables
  • Reseat the memory modules
  • Reseat any expansion cards

10.  Perform diagnostic tests on all hardware you're able to test. It's highly likely that the root cause of any given Blue Screen of Death is a failing piece of hardware:
  • Test your system memory
  • Test your hard disk drive
If a test fails, replace the memory or replace the hard drive as soon as possible.

11.  Update your BIOS. In some situations, and outdated BIOS could cause a Blue Screen due to certain incompatibilities.

12.  Start your PC with essential hardware only. A useful troubleshooting step in many situations, including Blue Screen issues, is to start your computer with the minimum hardware necessary to run the operating system. If your computer starts successfully it proves that one of the removed hardware devices was the cause of the STOP message.
Tip: Typically, the only necessary hardware for starting your PC through to the operating system includes the motherboard, CPU, RAM, primary hard drive, keyboard, video card, and monitor.


Tips:
  1. Find out that hardware is the cause of your Blue Screen? Try this:
    • Replace the hardware.
    • Update the hardware's firmware.
    • Make sure the hardware is on the Hardware Compatibility List.
    • Check with the manufacturer for support information.
     
  2. Find that a software program is the cause of your Blue Screen? Try this:
    • Reinstall the software.
    • Check for and install any available program updates.
    • Check with the developer for support information.
    • Try a competing program.
     
  3. Is your PC restarting before you can read the STOP Code on the Blue Screen?
    Most Windows PCs are configured to reboot immediately after receiving a serious error like a
    Blue Screen. You can prevent this reboot by disabling the automatic restart on system failure option.
Read More Related Topic:

Wednesday, April 22, 2015

How to Format/Unlock Tecno Phones

you may have been a victim of give out your phone to your love ones or friends and they messed it you trying to figure your password or doing something else and the get lock or not booting to home screen .

here is how to format you TECNO PHONES instead of going to the technician to waste your money. it is something you can do on your own.

Procedure:

  1. Switch off your phone.

Monday, January 26, 2015

Browse the Internet and Download fast free with DNS JUMPER


DNS – or domain name system – is the protocol on the internet that turns human-comprehensible website names such as sordum.org into addresses understandable by machines.(machine-readable “IP addresses”) , In some cases, you can increase the browsing speed or improve your security by replacing the DNS provided by your provider , DNS Jumper is a tool which makes it easy for you

Monday, December 15, 2014

TEN USEFUL ANDROID TIPS AND TRICK


Whether you are a newbie for android and eager to try out every available option you see on the screen, or familiar with the system, including the annoyances that plague you on a daily basis, tips and tricks to get around a system is always helpful. I am here to help you with that.


In this post, I will be featuring 10 Awesome and use android tips and trick that may improve your experience while using your Android device. Do note that the steps may vary a little from one Android phone to another due to the differences in the build and the OS version and also sometimes from mobile-to-mobile, but if you play around with it, the next step isn't too far off.

Tuesday, November 25, 2014

Learn How To Activate Your Verve Cards For Online Transactions at Nigeria ATMs


The Verve Card is the new Interswitch Debit Card now with the Chip and PIN. Verve is the new name of the more secure and convenient Interswitch card with which  the introduction of chip and PIN makes transactions safer and with Quickteller services, adds convenience to everyday life. Verve is issued by Nigeria Banks and powered by Interswitch. The Verve is simply the new name of the
InterSwitch ATM card. The different types of Verve cards includes: Verve Debit, Verve PrePaid and Master Card Verve. The Verve Debit Card is the one linked to your savings or current account by your bank.

You can use your Verve card on all channels (ATMs, mobile, POS, Web, and Kiosk) and locations with logos bearing: Verve, InterSwitch, Quickteller, Reward. I use my Verve debit cards a lot to pay for online transactions as well as transfer money to other bank accounts via the Quickteller app. You can also use it to withdraw cash, pay bills and purchase airtime at ATMs.
Nigerian Banks that currently issue Verve cards are listed below:

Wednesday, November 19, 2014

How To Enable Hibernate Option in Windows 8


To enable hibernate option in windows, click on the battery icon in the system tray and click More Power
Options:


Now from the left panel, click on “Choose what the power buttons do”

HOW TO DOWNLOAD TORRENT FILE USING INTERNET DOWNLOAD MANAGER


Follow these steps and you shouldn't have any problem

STEP 1== download torrent file from any website e.g thepiratebay.org,kickass.to, extratorrent.cc etc

STEP 2== go to torrent2ddl.com and click upload .torrent and request for a direct download link to your email

Friday, November 14, 2014

DIFFERENCES BETWEEN GPRS, EDGE, 3G, HSDPA, HSPA+ AND 4G


While discussing with a friend of my i was asked the differences between GPRS, EDGE and 3G, so i decided to share this knowledge today because i realize that there are people out there that don't know anything about Wireless Network .

Before advancing, it should be known that 1G, 2G, 3G, 4G etc refers to the different generations of wireless communication technology characterized by having a defined range of speed.


GPRS(General Packet Radio Service)
GPRS is a packet-based wireless communication service. It is a 2G technology network that support a download speed of up to 114Kbps. Limitation of GPRS is that GPRS data cannot be sent while a voice call is in progress.

Thursday, July 3, 2014

IPHONE PART 2 - NO SERVICE


i have discuss the part 1 of IPHONE on how to Unlocking your iPhone 3G. Here is the Part 2 for those that have unlocked their iPhone 3G and still see "No Service".
There is an easy way to remove the "No Service" iPhone 3G error and I can show you how to get rid of it in just a few easy steps.

Sunday, June 29, 2014

IPHONE Part 1 - HOW TO UNLOCK PASSCODE


IPHONE 3Gs RESET AND RESTORE:
1. Disconnect the USB cable from the iPhone, leave the other end connected to your Mac/PC
2. Launch iTunes
3. Press and hold the Home and Power button on the top of the iPhone to turn off the device
4. Press and continue to hold the Home button while you reconnect the USB cable to your iPhone, this will cause the iPhone to turn on