Easy way to take SCREEN SHOT ON ANDRIOD PHONE
Whether you’re a blogger taking a screenshot of Android apps or just someone that wants to show off their Android setup to your friends, the process of showing those snapshots can be stressful. While Android 4.0 offers a built-in way to take a good screenshot, that’s little consolation if you’re still using an older version of the Android operating system.
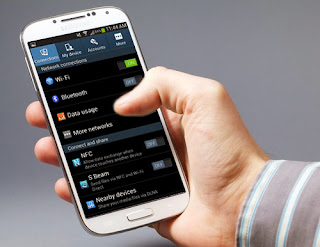
No matter what device you have, you can take a screen image without rooting your device. But rooting your device offers you some neat tricks — even if you’re using Android 4.0. You can take a screenshot by shaking your device or wirelessly via a web browser.
Take a Screenshot with Android 4.0
If you’re using Android 4.0 or later, this is easy. Just press and hold the Volume Down and Power buttons at the same time. You’ll see an animation on the screen, indicating that the screen photo was saved. Android will save the image to your Gallery. Launch the Gallery app and tap Screenshots to view and share your screenshot.
Android SDK
Is Taking A Screenshot On Android Really That Hard?
As an online writer for technology, I found this lacking feature disheartening. And it is possible to run apps that take screenshots on your Android, but you need root access – and for most manufacturers if you do that, you could void your warranty. Also, blocking your apps from root access is one reason Linux users are so proud of their operating systems – they are virtually immune from all viruses. When all other mobile devices get attacked – you’ll be standing strong.
However, despite this drawback, I also discovered that taking a screenshot of the Android screen isn’t really that difficult using a PC or laptop. And in this article I’m going to show you how to connect your Android device to your PC via USB and quickly capture a screenshot whenever you like. The first step of course is to make sure your PC is configured to quickly connect to your Android phone. To do this, you just need to set up the following applications once on your computer.
1. Install the USB driver for your phone onto your PC. You can get the Android driver for Windows
PCs here.
2. The Java SE developers kit.
3. The Android SDK developers kit
note: before you can download check the top right corner of your web browser and click skip advert after you have click on the link
Download and install those three applications, and you’re already halfway to taking screenshots with your Android quickly and easily. After you set up the Android SDK developer kit, you’ll be presented with an update screen that probably has an error saying you need to force download. Just cancel/close that screen and continue to the procedure below.
Setting Up Your PC To Take Android Screenshots (Only Have to Set Up Once)
Keep this in mind – once you go through the following procedure just once, you’ll be set up to instantly take screenshots on your Android with your PC whenever you like. Remember, you don’t have to do this every single time you need a screenshot, only once to configure your PC. Here’s how you set up your PC to take Android screenshots.
First, if you still have the Android SDK developer kit setup screen up (if you don’t just run the SDK Setup in the folder you extracted the files to), then click “Update All.” However, if you get the error that tells you to do a force download, then just click on the Settings option in the menu.

All you have to do is make sure that the “Force https://…” is selected under the “Misc” section. Click “Save & Apply” and then go back to the Installed Packages screen. Click on the “Update All” button.
Then just click on “Install Accepted,” and wait a while for the app to install all of the packages. It’s a good idea to just install all of them for compatibility. When this is done, go to the “Available Packages” screen and click on “Refresh.”

Now that you’ve updated the Android SDK developers kit, you’re ready to start taking screenshots of your Android device. However, I have one more step that will save you a lot of annoyance later. Create a link to the Dalvik Debug Monitor in the SDK developer kit that you can quickly use to capture screenshots. Just go to the Tools folder in the folder where you downloaded the SDK developer kit. Find the DDMS.BAT file there, and create a shortcut to it that you can place on your desktop whenever you want to take a screenshot.
Please Note: I ran into two significant issues when doing this setup on my 64 bit Vista installation. Running DDMS.BAT may return a few errors. You may need to manually enter the PATH in my system environment variables for the bin folder of your Java installation. You may also need to manually enter the ANDROID_SWT variable for the path to the swt.jar file in your Android SDK installation. You may not need to do either of these things – just pay attention to any errors the DDMS.bat file returns.
Now that you’ve configured your PC above once, taking screenshots of your Android from now on is fast and easy. The first thing you’ll want to do when you’re ready to start taking screenshots is to enable USB debugging on your phone. You can do this by going to Settings ->Applications->Development and click to enable “USB Debugging.”

Once that’s done, go ahead and plug your mobile phone into the USB port. Since you’ve already installed the driver for your device, your computer will identify and connect – if it doesn’t then just browse to directly where you downloaded the driver files (again, you’ll only have to do this once.)
Then, from now on all you need to do to take screenshots is as follows:
1. Run the DDMS.BAT file, and the Dalvik Debug Monitor will launch.

droid61 How To Capture Screenshots With Your Android Mobile Phone
You’ll see your device displayed in the left top pane. All of your phone activity is logged below and you’ll see the activity scrolling up the pane.
2. To take your screenshot, just click Device and then Screen Capture…

3. Just save your screenshot!

The screenshot is very high quality (and of course it’s huge, so you’ll need to resize it to use on your blog), and you can just click “Refresh” to get a new screenshot again. Once you’re set up to capture screenshots in this way, you’ll be able to start capturing some of the most amazing screenshots of your Android mobile device in three simple steps – launch DDMS.BAT, click Capture Screenshot on the debug monitor, and save the picture to your hard drive.
While it’s true that the initial setup on your PC can turn into a little bit of work depending on your PC configuration and operating system, it honestly doesn’t take a rocket scientist, and the highly detailed screenshots you can capture make it well worth it.
Do you take screenshots on your Android Mobile and if so, what approach do you take? Do you open root access to screenshot apps or do you prefer using the Debug Monitor approach? Share your own opinion in the comments section below!

Comments
Post a Comment