HOW TO FACTORY RESET A LAPTOP WITH A RECOVERY PARTITION
Restore your laptop back to its original settings
Restore your laptop to factory settings, If you need to give your laptop fresh start, we’ll tell you how to factory reset a laptop.
Restoring your laptop to the state it came out of the factory can be handy for a number of different reasons. Perhaps you’re having problems with your laptop’s performance, a virus or you simply want to sell it on and remove all your programs, files, passwords and other sensitive information. In these situations, a recovery partition is your friend.
It’s a little more difficult than a smartphone or a tablet but we’ll show you how to do it step by step.
Most laptops don’t come with recovery discs any more but if yours does then this is still a fairly easy way of performing a factory reset. If you didn’t get any discs in the box, then there’s a good chance your laptop has a recovery partition.
This is a hidden part of the hard drive which safely stores a complete copy of Windows, drivers and extra programs. You can use it return your laptop to the exact state it was in the first day you had it – and it will perform just the same, too. This guide will show you how to access and use the recovery partitions to factory reset your laptop.
Please bear in mind that the processor will vary between different brands of laptops and even different models. The recovery software will be called various names for each brand of laptop, along the lines of ‘recovery manager’. We’ve done our best to put together a ‘one size fits all’ guide.
In general this will work for Windows 7 and previous versions but Windows 8 laptops will typically have a recovery application which is launched from within Windows so check your app menu.
How to Factory Reset a Laptop
Step One
Backup any data which you wish to keep before performing a factory reset. You will probably want to copy everything from your user folders, including documents, photos, music and videos. The factory reset will delete all these along with any programs you’ve installed since you got your laptop.
Step Two
Start-up or reboot your laptop.

Step Three
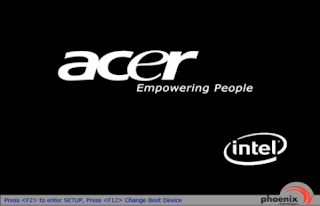
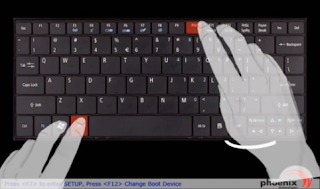
During the start-up process, hit the appropriate F këy or këy combination which we have listed below for your manufacturer.

Note: There is often a small window of opportunity to strike the këy so don’t worry if it takes you a few attempts. I advise pressing the këy multiple times.
Acer – Alt + F10
Asus – F9
Dell/Alienware – F8
HP – F11
Lenovo – F11
MSI – F3
Samsung – F4
Sony – F10
Toshiba – 0 (not numpad) while turning on, release këy when Toshiba logo appears
If these keys don’t work then look out for a message in the screen during startup which might indicate how to start the recovery process. You might need to check your recovery partition is enabled in the BIOS. It’s also possible your laptop might not have a recovery partition (or it may have been deleted) so we’re making no guarantees here. You might need to contact your manufacturer.
Step Four
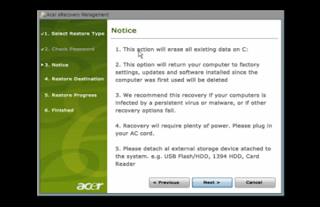
You should see instructions on the screen explaining how to proceed. Different manufacturers use different software to restore the ‘disk image’ from the recovery partition, so we can’t provide specific guidance. However, the process is almost always automatic once you’ve confirmed you definitely want to proceed, so it might be a case of waiting for 30 minutes for the job to happen in one go, but some systems restore Windows first, and then install drivers and programs automatically when Windows first boots. If that’s the case, don’t try to do anything until you see a message saying the restore has finished.

Read More Related Topic:
HOW TO FIX BLUE SCREEN PROBLEM ON LAPTOP AND DESKTOP
PC ERROR AND SOLUTION FOR THEM


Comments
Post a Comment